 By Mark Mutti on December 8th '20, 9:16pm PT
What do you do when stock video clips don't fit the bill? This is the question I had to answer recently, and the solution was to ask a pilot friend of mine to fly me over and around ANF. Well that escalated quickly! Let's talk about how I arrived here, and all of the little details that go into filming from a small fixed wing aircraft.
Why aerial footage?
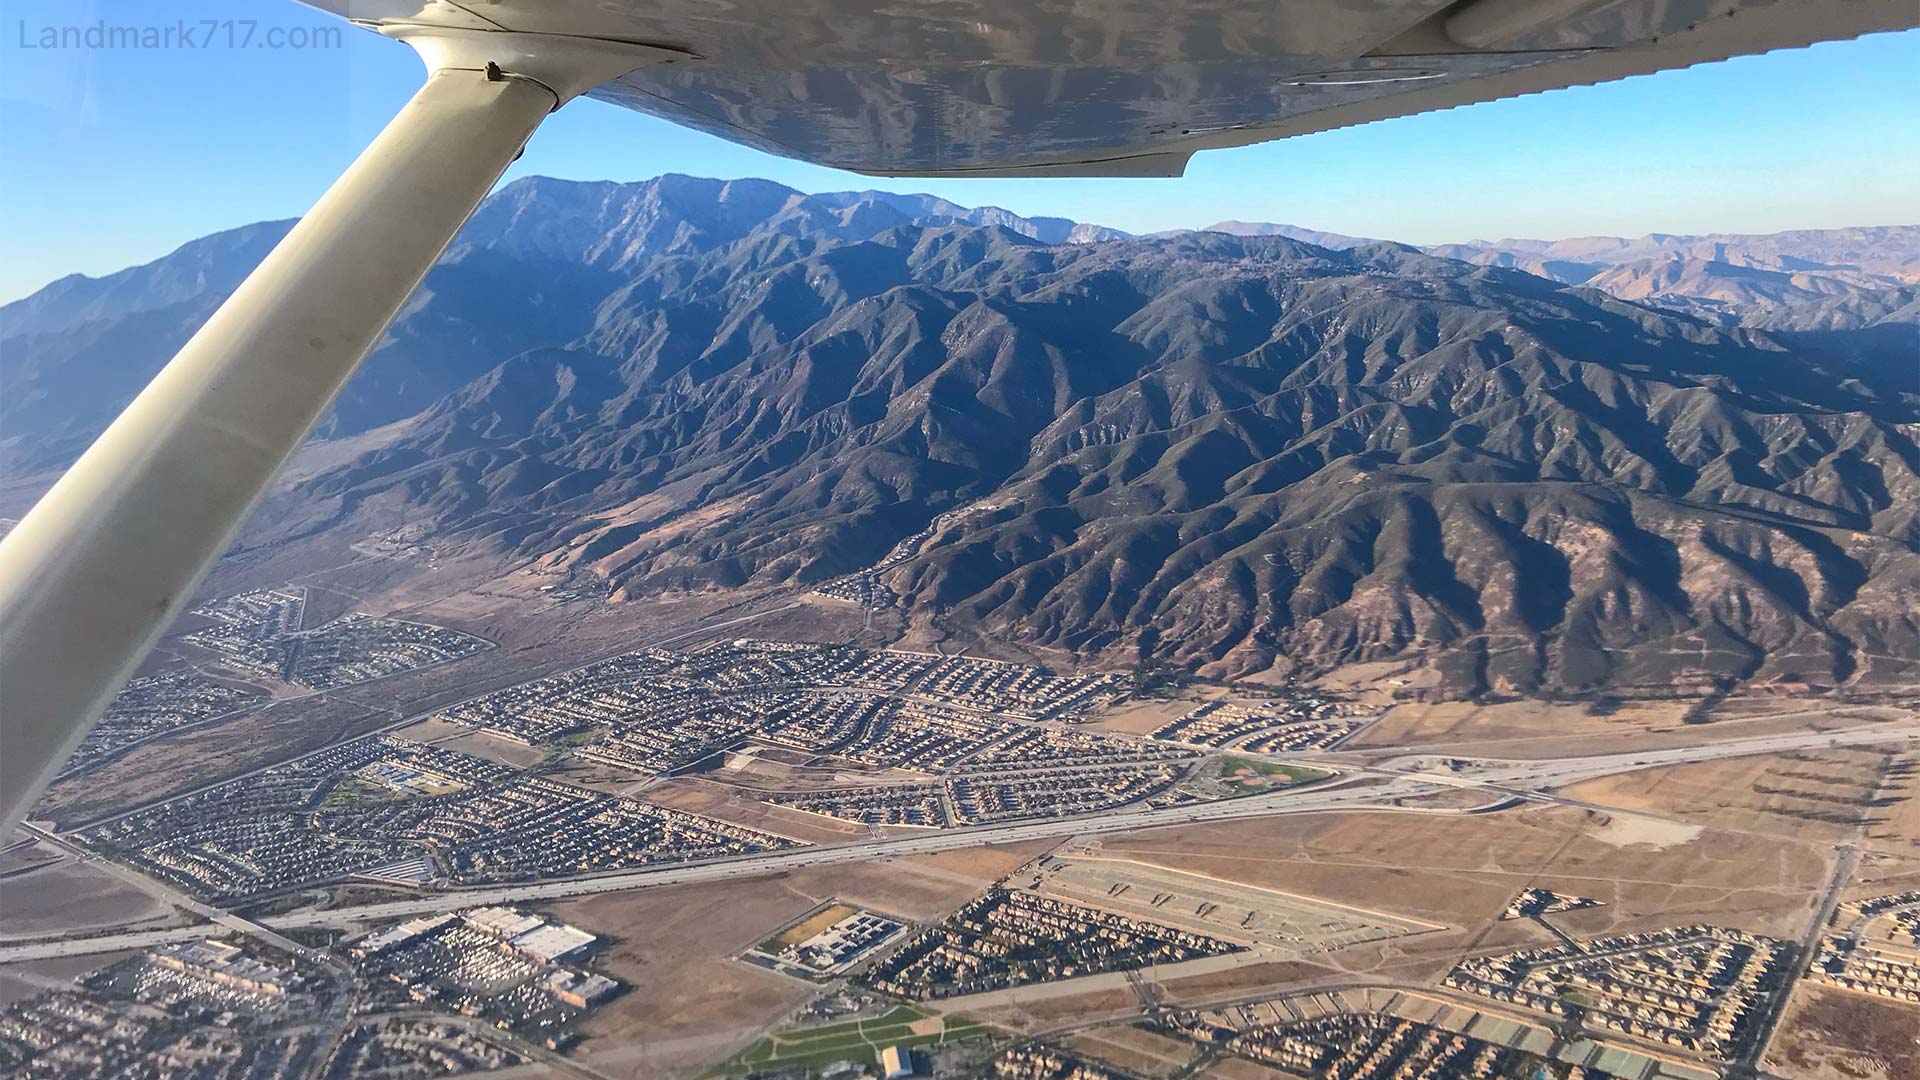
One of the best things we as filmmakers can do to increase our production value is adding as many perspectives as possible, in many senses: storytelling, times of day, and in this case, camera perspectives. In this docuseries, I envision a myriad of those, from macro (close up) photography, to aerial, and everything in between. I think each of these showcase nature's beauty in different ways whether it be a macro perspective of an anthill, a wide shot of a mountain range, or an aerial view showing the subject as far as the lens can see. The San Gabriel Mountain Range, from 5,500 feet above Fontana
What about stock footage?
Stock footage is a fantastic resource! In fact, some of the footage I shoot for this very project can be found for sale on stock footage websites. As of this writing, my sales have totalled enough to cover about 1/200 the cost of my go-to lens. Oh well, I do it for fun anyway 🙃 So, here are a few reasons I'm shying away from using stock footage:- It doesn't tell my story: stock footage of ANF doesn't focus on the focal points important to me or my storytelling about specific landmarks, historic sites, and so forth. It's often utilitarian rather than cinematic
- It's expensive: for the cost of a single (very nice) 4k clip, I was able to afford fuel for a two hour flight and capture all of the footage I wanted
- The look: the stock footage could actually outshine mine, and feel out of place. They use helicopters, these incredible gimbal systems by a company called Shotover, and cameras by RED. This footage is so polished that it's almost unreal, and I think it would feel out of place among the real feel I'm going for
- Effort: call me a masochist, but I really enjoy having to work for my footage
- Ego: I would dread the moment I screened an episode to friends and somebody said "that one aerial shot was really incredible!", referring to something I simply went out and purchased
- I haven't turned to stock footage yet, so why start now? I'd have to credit the source, and fiddle with royalties on a project meant to never see a penny
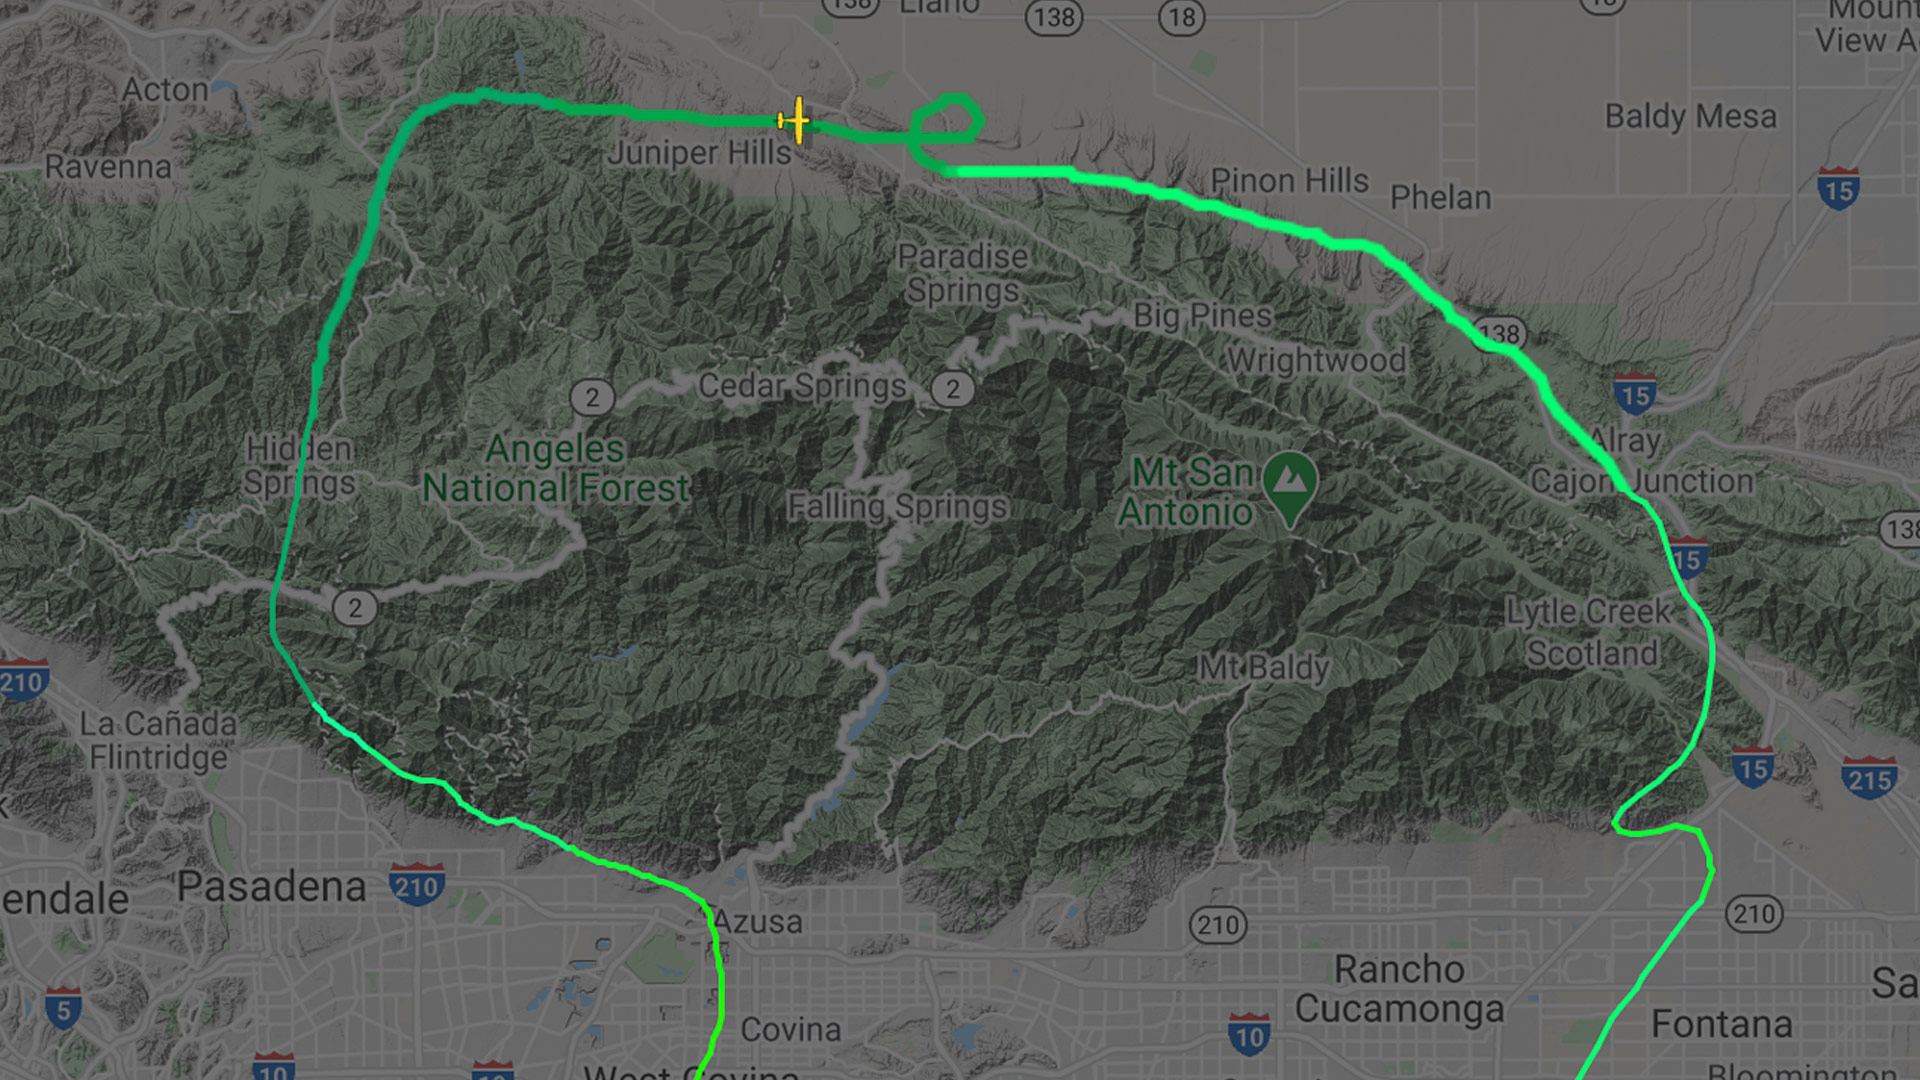
 Our flight path, tracked by FlightRadar24
Why not a drone?
My aim is to sprinkle in a conservative amount of drone footage, only when it's the best way of showing a focal point. A drone is currently in use for Landmark 717, but still:Trigger warning to my fellow drone pilots and/or filmmakers
- It's become an abused method: when drones first hit the consumer and prosumer markets, filmmakers discovered a button they could press to give audiencess a different perspective, and boy did they abuse that. Now, drone footage has almost if not entirely lost its special edge
- Altitude limitations: they can't legally or physically fly as high as airplanes and helicopters. The video at the end of this blog entry is a good example of something we couldn't have filmed with a drone, showing the southeast border of the recent Bobcat Fire from around 5,200 feet AGL (Above Ground Level). To put that into perspective, DJI's most robust drone tops out around 1,200 feet
- Airspace/FAA restrictions: looking at this GaiaGPS map, we can see that a large portion of the area of ANF I do most of my filming in is made up of Wildnerness Areas, illegal to operate drones from
- Disruptions to people: my approach when filming is to observe and be as unobtrusive as possible. While an airplane at 5,000 feet will hardly make a sound on the ground, the unmistakable sound of drone propellers almost certainly will. And if you're like me, when one's nearby, you wonder if it's looking at and filming you, or what the deal is. This is not a situation I want to put anybody in
- Disruptions to wildlife: yes, this is a thing to worry about as well
Challenges of a small plane
Shooting handheld out of a plane window poses several challenges:• Holding a camera for long periods of time is uncomfortable, and muscle pain will lead to sloppy filming
• It's bumpy
• There isn't a lot of space
• Filming through plexiglass is less than ideal for a few reasons because it:
• Creates glare when light hits it, softening the entire image
• Creates reflections of the cockpit when light hits the cockpit, creating distracting artifacts in the image
• Will almost always have fine cracks in it, again adding artifacts to the image. And in the case of the smaller camera I tested, the auto-focus became enamored with the tiny cracks, refusing to focus on the actual focal points
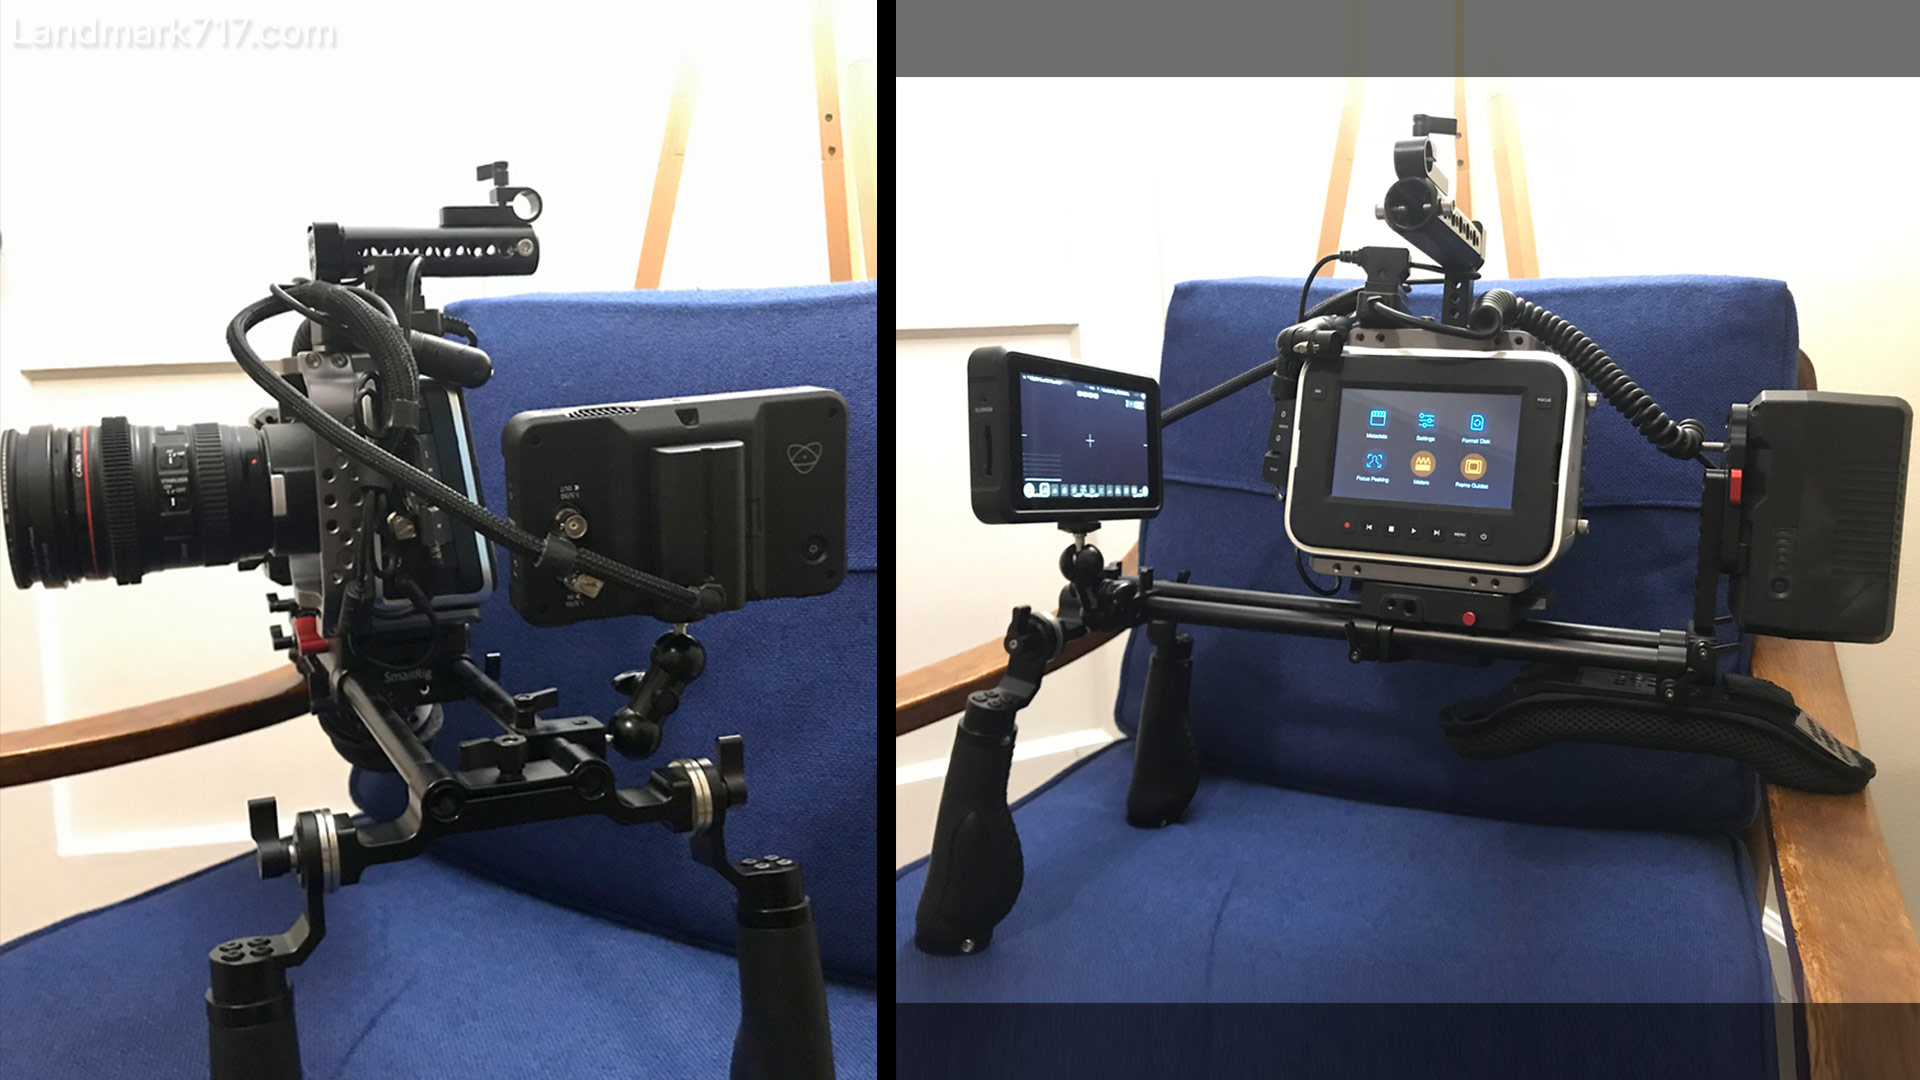
My attempted remedy to these challenges was to reconfigure my primary camera to shoot sideways out the window as I faced forward. This odd configuration along with a lens configured for a shallow depth of field helped it "see" past the small cracks in the window:
 The sideways camera, configured so I can film out the right window while facing forward
Overall, it went very well with this camera! I also took out and tested my DJI Osmo Pocket, and while its incredible mechanical stabilization system (aka a gimbal) did very well, its small optics similar to those found in smartphones lack the ability to "see" past the tiny cracks in the window. I have an idea of how I might overcome this in the future, which would be great because airplanes plus a camera on a gimbal is match made in heaven.
Prettying it all up / The final result
The video below first shows footage exactly as it was captured by the cinema camera, then the same footage with the power of post-processing on its side: a corrective LUT (Look Up Table), color grading (correction), and automated stabilization. The second clip plays in reverse to avoid a jarring jump cut:Not that we're covering editing, coloring, or visual effects in this blog entry, but the above was all done using Davinci Resolve 16 of which I am a big fan!
I hope this blog entry has added some form of value to your life. If you have any questions about this process, my lessons learned, or anything else, please drop me an email any time.